Creating a Web Page using HomeSite
HomeSite is a Web authoring and management tool that requires some knowledge of HTML. HomeSite consists of an editor where you add text, links, images, tables, forms and other elements to your page. Homesite also has a Browse mode that will display the page as it would appear with a WWW browser.
- When you click on the New Document icon, you are provided with a template.
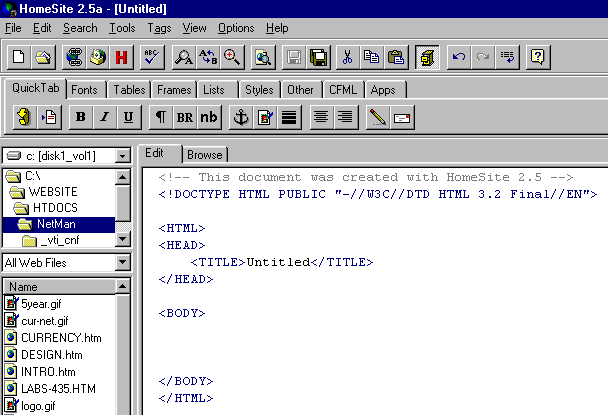
- Make sure to change Untitled to the Title of your document. Everything else needs to be inserted within the BODY of the document.
- You can also insert images, hyperlinks anchors and other tags by clicking the appropriate icons in the HTML bar above the Edit window. The most important tags on QuickTab are the anchor tag (for links) and the image tag next to it. Most of the other tags are self-explanatory. You can insert tags for fonts, tables, frames, etc. by selecting the appropriate tab.

- To the left of the edit window is the document list. If you wish to link to a document in the list, simply drag the file icon from the document list to the edit window. This works for both anchors and images.
- Many of the tags with parameters can be edited by selecting the tag and then clicking the tag with the right mouse button.
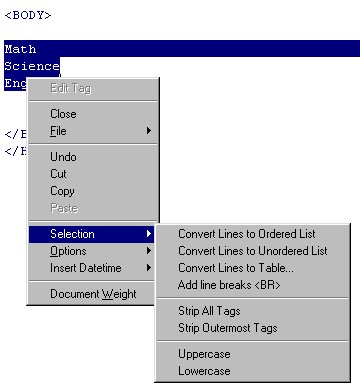
- A list (ordered or unordered) can be created by highlighting the lines to convert to a list, clicking the right mouse button, and then choosing Selection from the menu.
- You can preview your document from HomeSite by selecting the Browse button. The appearance might not be exactly the same as when the document is viewed with a regular Web browser. If you wish to view your document with Netscape Navigator or Microsoft Internet Explorer, make sure that you save your file and reload your document in the browser.
- You should spell-check your document and verify the links on the page. Save your document when you are finished.