Installing and Configuring Virtual PC (Part
1)
(http://www.windowsnetworking.com/articles_tutorials/Installing_Configuring_Virtual_PC_Part1.html)
(http://www.windowsnetworking.com/articles_tutorials/Installing-Configuring-Virtual-PC-Part2.html)
Installing virtual PC
Before installing virtual PC it is recommended that you backup your files to a remote location other that the machine that you will be installing on. It is also recommended that you cease any jobs applications or other installation processes. If you have previous versions of virtual PC it is recommended that you remove them from the computer. Note that virtual disks may not run on different versions of VPC. IT is recommended that you be at the console when installing virtual PC to avoid reconnection issues cause if you are using remote access when the TCP stack is rebuilt.
Resources
When designing a virtual PC system that will be integrated into a live
environment it is vital that the network professional ensures that the
Host machine resources are appropriately specified. The table below
is Microsoft’s recommendation as of
Virtual PC supports up to 3.6 GB of RAM per virtual machine, up to a total of 4 GB of RAM on the physical machine.
|
Host operating system |
RAM |
Disk space |
|
Windows XP Professional |
128 MB |
2 GB |
|
Windows XP Tablet PC Edition |
128 MB |
2 GB |
|
Windows 2000 Professional |
96 MB |
2 GB |
|
Guest operating system |
RAM |
Disk space |
|
Windows XP Professional. |
128 MB |
2 GB |
|
Windows XP Home Edition. |
128 MB |
2 GB |
|
Windows 2000 Professional |
96 MB |
2 GB |
|
Windows NT Workstation 4.0, Service Pack 6 or higher |
64 MB |
1 GB |
|
Windows Millennium Edition. |
96 MB |
2 GB |
|
Windows 98. |
64 MB |
500 MB |
|
Windows 95. |
32 MB |
500 MB |
|
MS-DOS 6.22. |
32 MB |
50 MB |
|
OS/2 Warp 4 OS/2 Fixpack 15, OS/2 Warp Convenience Pack 1 OS/2 Warp Convenience Pack 2 |
64 MB |
500 MB |
To install virtual PC double click the setup icon within the disc or insert the disc and the auto play function will start the installation automatically. Please note that a restart is required after the installation of Virtual PC.
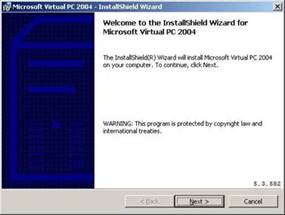
Once you click install the screen above will be presented then click next.
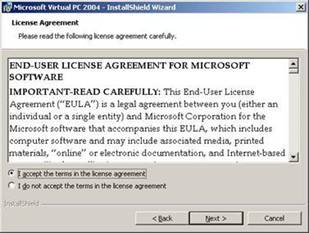
Read the license agreement and then click I accept then click next.

Type in a user and organization and a serial number then ensure that anyone that uses this computer is selected then click next. IF you choose to install the virtual PC for only the user that is logged in be aware that the software will run in the context of the installation. It may be more secure but if it is installed as a user that has restrictive rights then access to certain resources may be denied and settings will not be inherited from profile to profile.
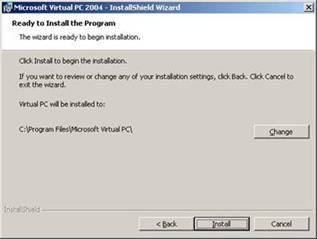
Select the location of where to install your virtual PC then click next remember that you will need to ensure that there is enough space on drive selected. It is recommended that the drive selected be quick and has redundancy be supplied and enabled. This will minimize risk in event of failure.

The virtual PC then takes some time to initialize and install and during this time you will be presented with a status screen that displays the progress of the installation if the bar freezes for a while it is recommended that you wait several minutes as some time initialization take a little while depending on the hardware you are installing the virtual PC on, if this condition persists cancel the installation, restart the machine and restart the installation. Click next to continue.
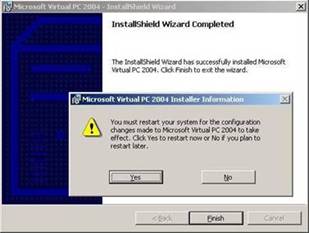
This screen is then presented next and it will require a restart click on the yes button if you would like the machine to restart, this is recommended.
Multiple virtual machines
Using virtual PC enables the network professional by providing the flexibility of running several virtual machines and different combinations and configurations of operating systems and applications on one physical computer. This methodology eliminates the necessity of setting up different physical machines, and allows organizations the elasticity needed when consolidation is a consideration, however it introduces new problems and scenarios to consider when planning for VPC deployments. Using Virtual PC allows the organization to share hardware that it would otherwise have to purchase individually for each respective machine or task and this may be beneficial from a financial perspective but introduces another level of risk to be considered regarding single point of failure. Do not overlook this point as a restart of the host operating system will result in all of the virtual machines installed becoming unavailable and the IT professional will then have to reinitialize the host operating system and guest operating systems to get them to function correctly as intended.
Also note that shared recourses, if not tested properly, may function differently than expected. Inexpensive items like NICs and CD drives may function erratically if shared, and will not perform at the normal speed. CD drives have locking mechanisms that are linked to software that locks the drive on the corresponding guest operating system; some systems that reference a CD in a drive and that have files in use while another operating system is attempting access can cause the main operating system to require a restart.
Being aware of these ramifications will assist the IT professional in designing a robust and well thought out VPC solution that can be used safely in production.
Some guidelines that will clarify installation and configuration settings follow:
- Before installing and configuring VPC ensure that you have administrative control of the host OS.
- Ensure that each virtual machine has a unique name and make it descriptive in order to identify it at a later stage.
- Ensure that there are enough resources for both the operating system and guest operating system to run. If more than one VPC session is open assign appropriate resources to each virtual machine.
- Remember that resources are shared on the VPC and that when moving from machine to machine captured drives and resources alternate.
- Remember to share your data between virtual machines.
- When using virtual machines it is a good idea to make a small banner in MSpaint to facilitate identification of each VPC.
- Set all resolutions to a Std resolution to make transition between VPCs easier.
- It is also possible to use remote desktop to terminal into the machines to administrate these machines.
- It is a good idea to use NTFS on the Host OS.
- Each virtual machine needs patches and security updates, and each VPC needs an antivirus, Note if this point is overlooked it may result in the comprimising of the entire system. Licensing can be tricky and it is the IT professional’s prerogative to check the agreement with the respective vendor.
- Accessing shared folders on other machines or on the host can be achieved by mapping a folder to a drive from the virtual machine to the shared folder on the host machine. This is an efficient way to transfer files from guest system to host system or from guest to guest.

After installing the Virtual PC you will need to run the new virtual PC wizard. This will allow you to create a virtual drive. This drive consists of one file that contains all of the system and boot files found in ordinary installations of operating systems. The file's extension is .vhd if you enable undo disks, these disks allow you to make changes to the virtual PCs for test purposes and let you back track to a point in time before the changes. These disks have the .vud extension. .vmc is temporary; a disk that stores information in a non volatile state like the hibernation file in windows. This screen also allows you to use the default configuration and this will create an automatic version of the virtual hard disk, or you can select previous Virtual drives to boot off. Please note: previous versions of Virtual PC sometimes create virtual drive files that are not readable or accessible by newer versions of virtual PC. When you have made your selection, please click next.

It is a good idea to assign each virtual machine a unique name that is descriptive and easy to understand. When you have chosen a name click next.
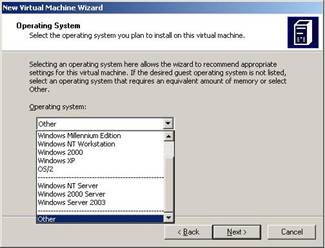
Virtual PC is able to host and run software that is compatible with x86 standards. This makes virtual PC flexible and empowers the professional to install a range of software on one machine for testing purposes. Once you have selected the respective operating system click next.
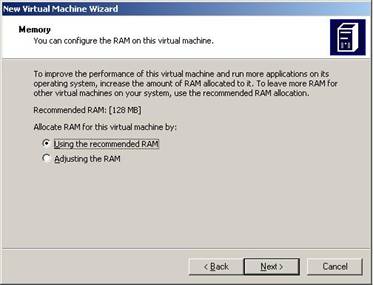
When this screen is presented you will be able to specify how much RAM your guest operating system will use. I recommend you double the RAM from the recommendation displayed if your budget allows.

This screen is simple yet important when assigning your virtual disk a name and location it is important to turn on undo disks if you require the machine for testing or if you will be making changes that you are unsure of. Although this option uses up some free space it is well worth it and saves you from reinstalling if you make an uncalculated mistake. When you have completed your selections then click next.

This screen is the follow up screen that defines where the virtual drive is installed. When you have completed your selection click next.

This screen will summarize your settings if you are content with your selections then click finish to create your virtual machine.
Once you click finish, your virtual machine will have been created and configured. You will now need to install a guest operating system on the virtual machine once it is started. Treat the machine as you would a normal computer. You will be able to boot from CD to install the operating system within the virtual machine. Open the Virtual PC Console to begin.
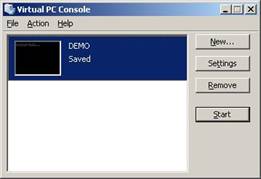
This is the virtual PC console; you will need to get familiar with this console if you are going to be using virtual PC. It is very simple and has four options that will be expanded on. The New button facilitates the creation of new virtual PCs. Once you have created new virtual PCs they are displayed on the left panel. From the file option you are able to initiate the disk wizard. The settings option when clicked reflects the settings of the selected virtual machine, and are fully applied to the machine once the virtual machine is restarted if it the VPC is open. Some of the key settings are described below. The remove button removes virtual PCs that have been created. The start button initiates the virtual machine and this in turn emulates a computer booting with its own virtual BIOS and booting process. Also note by using the action menu you are able to pause and resume a virtual machine. This option is useful if you want to quickly suspend an operating system so that you can shutdown the host operating system and when you restart the host you can resume the virtual PC back to the point you were at before you started.
Some settings screenshots follow that will help in the configuration of VPC.
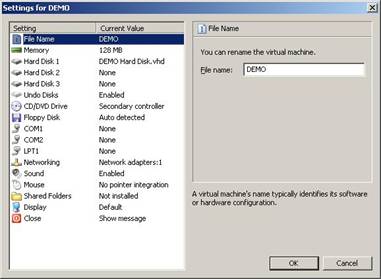
This screen is presented once settings are clicked in the VPC console. You are able to configure the name of the VPC RAM memory allocation some of these settings are only available with in wizards and are restricted by the physical resources available within your host machine.

Each virtual machine can be setup to use no network adapter or four network adaptors. These can be configured to access internal network machines, other virtual PC machines and internet machines. This technology functions as a great tool when testing a networked environment.
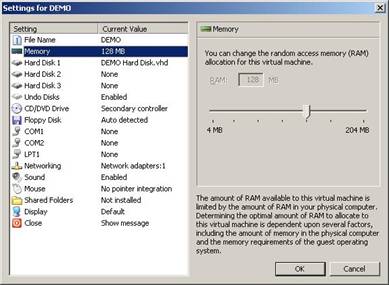
This screen displays the amount of RAM that has been assigned to the virtual machine.
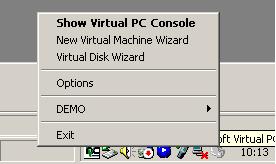
You can quickly get to the virtual PC console by right clicking on the tray icon near to the time and selecting show Virtual PC console.

By clicking options you are able to control global settings that apply to all of the virtual PCs that have been created. You are then able to make single changes that apply though out the subsidiary virtual machines.
Note: Ref: MS CHM file. If you replicate or image a vhd file you will need to change the MAC address. Edit the .vmc file to remove the MAC address. Find the following line:
<ethernet_card_address type="bytes">0003FFxxxxxx</ethernet_card_address>
Remove the number so the line appears as follows:
<ethernet_card_address type="bytes"></ethernet_card_address>
After you remove the number, Virtual PC will create a new MAC address the next time you start the virtual machine.