Lab 1X - The UNIX Xfce desktop
ON DOING CLOSED LABS: Read everything! Careful reading of the closed lab instructions is a must. You simply cannot delve into a lab and start typing. Unlike a verbose textbook where you can often skim over material, labs are much shorter and almost everything written is important. Read the material and, only where and when directed, enter commands. Be patient, both with yourself and with the lab material---remember, you are a beginner at this stuff and it will take a while to become proficient.
EDUCATIONAL OBJECTIVE:
Earlier, you customized your ranger course computer account
in
Closed Lab 1.
You are now ready to use ranger to do some work.
The exercises below will give you a brief introduction to
accessing the Xfce desktop via X2Go
and let you practice entering a few UNIX commands
and using some of the Xfce features.
STEP 1.
LOG ON USING THE X2Go CLIENT:
We will be using a UNIX Desktop environment
for the exercises below.
(Unlike in any specific version of Windows,
where there is typically only one standard desktop environment,
there are several possible UNIX Desktop environments.
The one we will be using this semester is called
Xfce.)
Although we will again connect to ranger,
we will do it a bit differently---instead of using PuTTY,
we will use a program installed on the lab PC you are using
that is called the X2Go Client.
To connect to ranger via the X2Go Client,
double-click the mouse on the
ranger X2Go icon
that looks like this one in the upper right-hand corner of the screen shot:
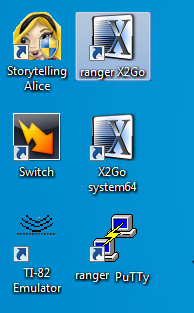
Make sure the icon has the label ranger X2Go! When you double-click on the icon, you should get an X2Go login window. Unfortunately the screen resolution left from the previous user might be the wrong value. Dismiss the login window by pressing ESCcape and you'll get the following selection window.

The third drop-down item under ranger should say "Display 1". If it doesn't, open the menu and select that entry. Be sure the rest of the values in that window say the same things as in the sample image above. When everything is set, click the window and you'll again get an X2Go login window like the following:
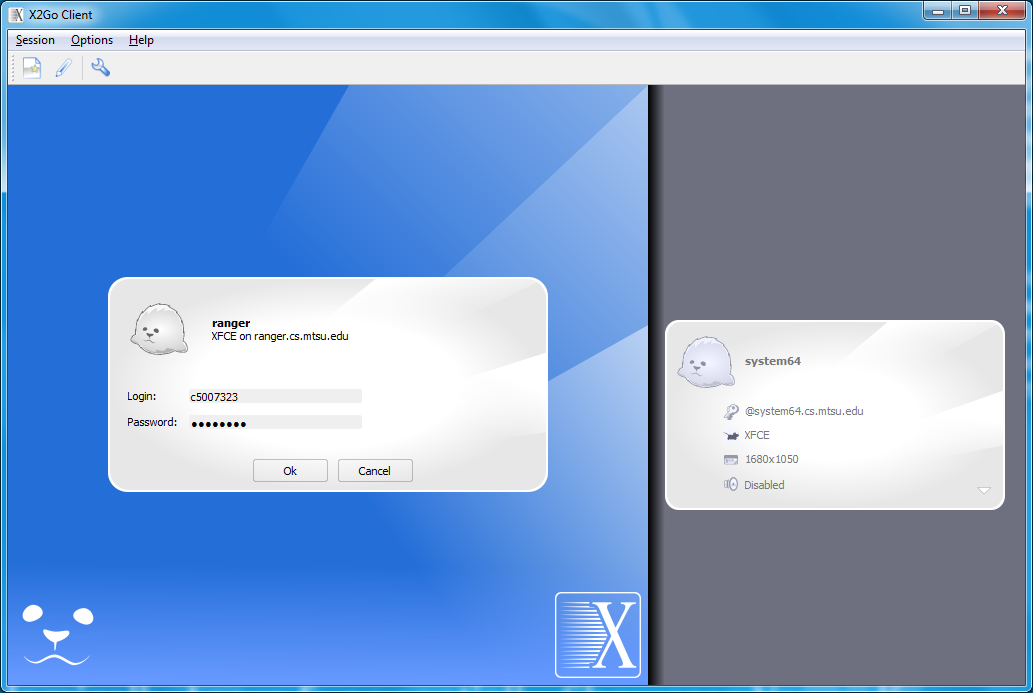
Use your course account information to access ranger. Inside the Login text box area enter your course account's C-number (that is, the 8 character login username you were assigned; for example, c1003534). In the Password text box area, enter your course account's password; for example 74ab2w45. Your password will not be displayed but will echo as a row of dots or asterisks, such as "********", so be careful in your typing.
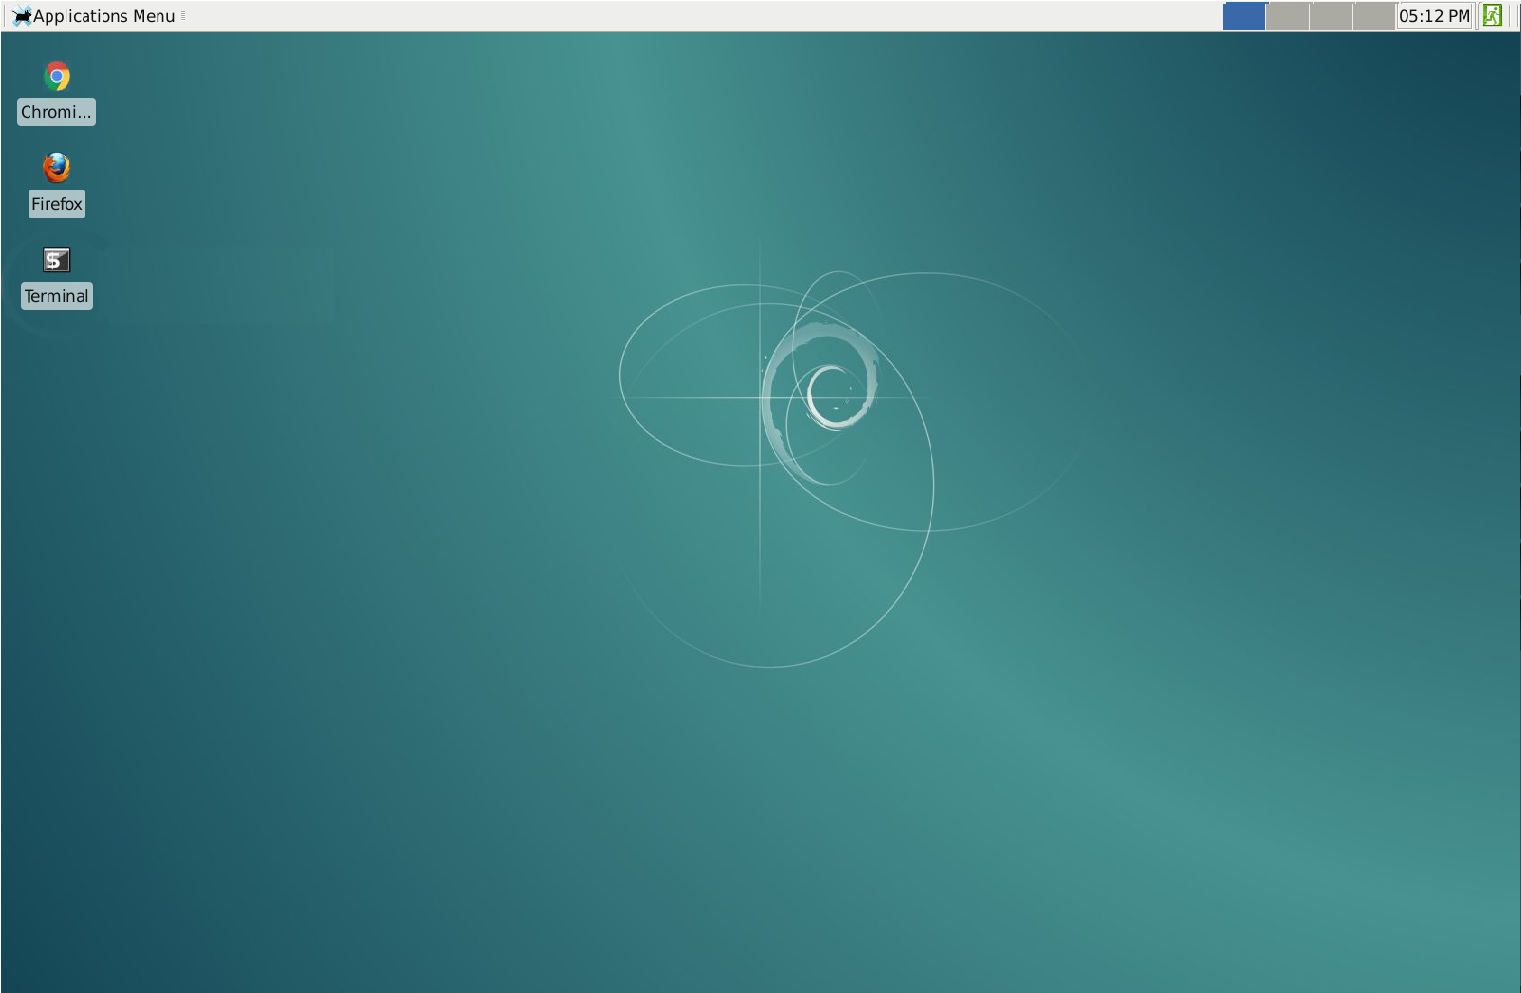
After filling in the requested information, click the Ok button and after a few seconds a full-screen window should appear (as depicted below). We call this the UNIX Desktop window.
Note: If you are unsuccessful after several attempts, check to be sure the Caps Lock key is not locked on the keyboard. If it is, unlock it and try again. Otherwise, ask the lab assistant for help.
It may take a few seconds for the UNIX Desktop to appear and your window may temporarily be dark before finally fully displaying. This larger window with a teal (I dunno, what color would you call it?) background shows that your PC is properly connected to the ranger system. If you cannot get the UNIX Desktop window to appear, then ask a lab assistant for help.
STEP 2.
USING the Chromium browser:
Once you have an active UNIX Desktop,
you will open up the Chromium browser.
Chromium is just another name for Google's Chrome browser.
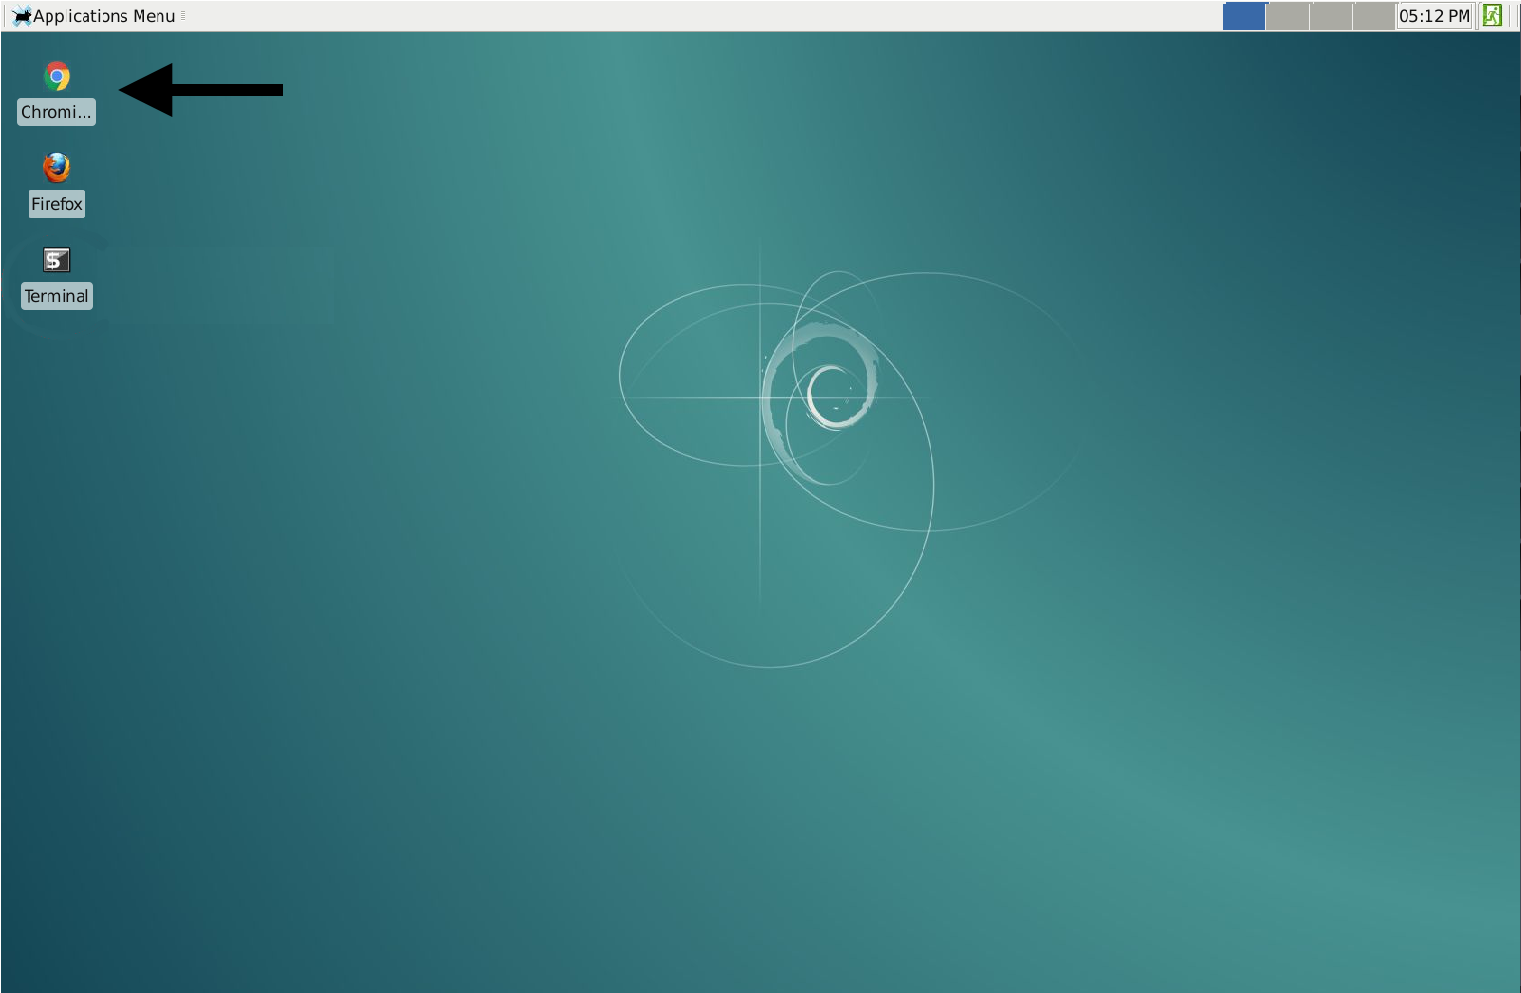
Move your mouse to the Chrome/Chromium icon on the desktop
and double-click the Chromium icon that appears there.
Observation: icons on the top toolbar are activated by single-clicking
but the icons on the desktop are activated by double-clicking.
The arrow in this next screenshot points to the Chromium icon:
STEP 3.
GETTING A TERMINAL WINDOW:
When you are done with STEP 2, you will open a Terminal window
on your UNIX Desktop.
There are several ways to open up a Terminal window. The easiest is to double-click on the big desktop Terminal icon that is usually located on the left side of the UNIX Desktop. The arrow in this next screenshot points to this Terminal icon:
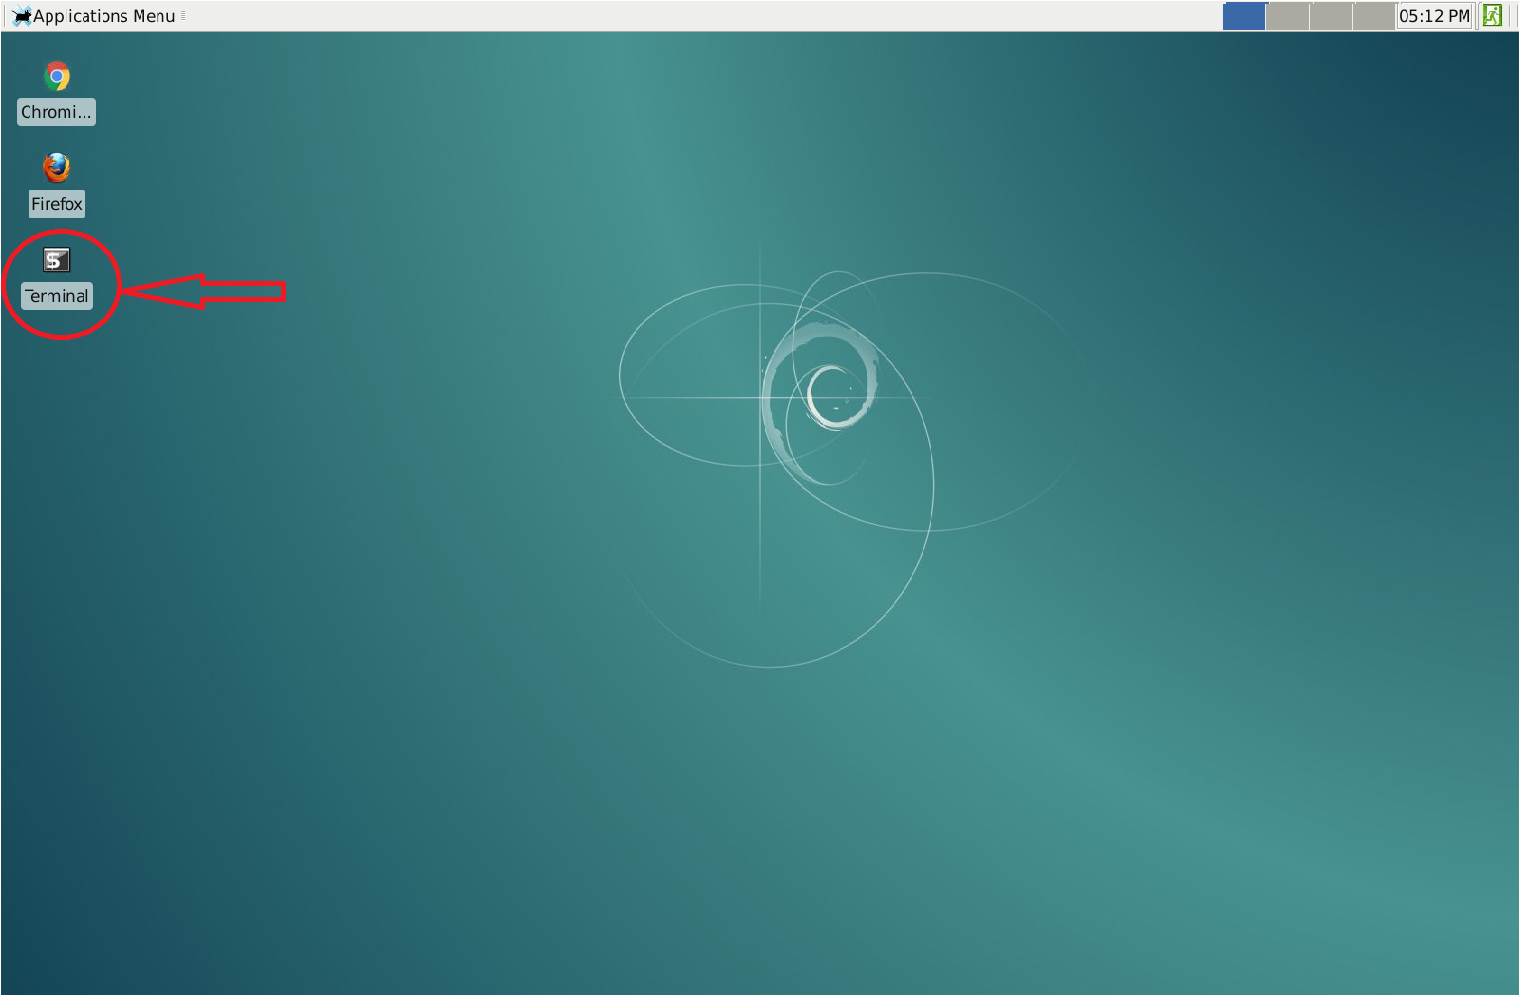
Alternatively, if the terminal icon is missing, you can move your mouse to the top menu bar where the pull down selections for Applications Menu are located (top left corner) and select the Terminal Emulator item.
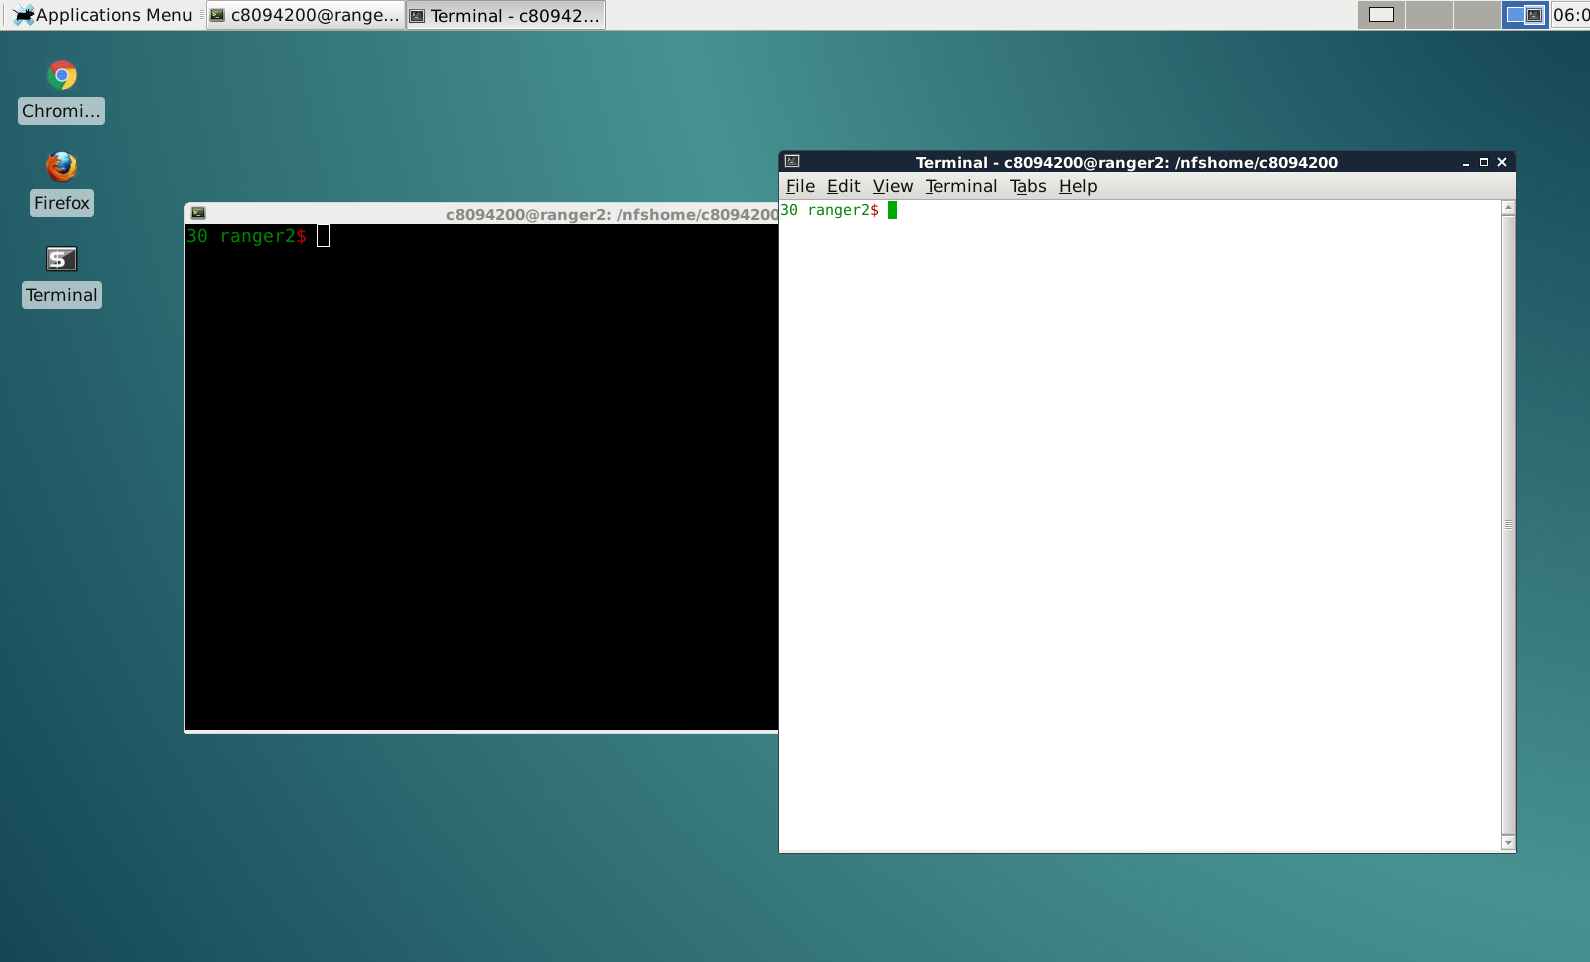
The background of your terminal window will be either black or white
depending on how your system is configured and which method you used
to get the terminal window.
(The picture below shows examples of both; however, you should have only one
or the other of these on your UNIX Desktop at this point.)
You can move windows and arrange them as you like.
To move a window, click the left mouse button on the title bar of the window,
hold it down and drag the window into position.
To make a window active, move the mouse on to that window.
Focus follows mouse; you do not need to click.
If you move the mouse off that window to another window
(other than the big bluish/teal root desktop space)
it will make that window active.
USING THE TERMINAL WINDOW: Much of UNIX is "command driven"; that's a fancy way of saying that to get most things done, you type out command instructions inside a Terminal window instead of clicking on icons. UNIX is case-sensitive, that is, it distinguishes between upper and lower case letters. It is important to type the commands exactly as indicated. Failing to put in a space where required is an error; however when a space is required, the amount of space (i.e., the number of blanks) is usually not critical.
The default Terminal window size is 24 rows long and 80 columns wide;
that is what we usually want it to be.
You can resize a window by placing the mouse over the
top or side window edge, then click the left mouse button, hold and drag.
Although the Terminal window can be resized,
it MUST be at least 24 rows long and 80 columns wide.
Any smaller than these minimum dimensions and certain commands get messed up.
You can check the current size of your window by entering
the following UNIX command, do so:
$ stty size
(Do NOT enter the dollar sign as part of your
command. It is meant to represent the prompt provided by the system.)
This will display the number of rows followed by the column width.
If the window is too small, resize it larger.
STEP 4.
Starting CodeLite in a Terminal
To start a CodeLite session, simply type "codelite" in a terminal, as shown below:
$ codelite
Your next lab has detailed instruction on how to proceed with C++ programming within codelite.
Follow the instructions carefully. It is important that you setup codelite correctly at the beginning.
Once you are done, you should close your terminal window by entering
$ exit
and then logging off ranger
by closing your UNIX Desktop.
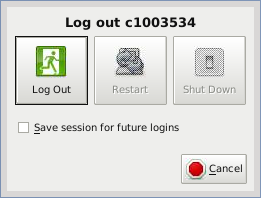
To log out, click the green (running person) Quit icon
on the far upper right of the menu bar.

In the resulting window, select the Log Out item.
Congratulations! You have finished Lab 1X.